
Did you know that almost every SLR lens you own is a macro lens? Sure, you might actually have a specialty, close-focusing objective, usually a zoom of some kind which will allow you to take shots a few inches from your subject. If so, great. Go snap some pics.
If not, you can press pretty much any lens to the task. All you need to do is to unscrew it, flip it 180º and hold it in front of the camera’s lens-hole. That’s it. Of course, there are a few extras tips to make things easier, but the principle is simple — mount the lens backwards and it will focus to within a few inches of the front end.
Before we get onto the more substantial hacks, there are a few
precautions you need to take. The biggest problem will be dust. With
film cameras this wasn’t a problem — the "sensor" was renewed every
time you wound the film to a new frame. With digicams dust can be a
real problem so make sure you blow the front and back elements of the
lens clean before each reversal, and avoid dusty and drafty places.
Second, and only a problem for those who stay in program mode all the
time, is the exposure. The easiest way is to take the exposure reading
with the lens still mounted on the camera and enter those settings in
manual mode. If you have a camera which can use the aperture ring for
setting the aperture, enable this — you’ll then be able to actually
make use of the light meter when the lens is de-coupled.
Last is focus. Fancy, purpose made reversing rings may include a
bellows for changing the distance between lens and camera to enable
focusing. For us, with our ghetto hacks, the easiest way is to move the
camera. Get in close and look through the viewfinder. Slowly move back
and forth and you’ll see parts of the image snap in and out of focus.
At these distances, and with your lens wide open, the depth of field is
tiny and accurate focusing is critical. It also makes for pretty
dramatic shots.
So, the hold-the-lens-in-front-of-the-camera method works great. But if you want something a little more stable, try this great little hack from the excellent DIY Photography. It uses a body cap (the plastic cover that came with your camera) and a filter ring (with the glass punched out):

Cut a hole in the body cap, glue the filter ring to the front and you’re done. One side will mount on the camera, the other screws into the filter thread on the lens. This will keep out the dust and leave your hands free, but remember to be careful with the rear element of the lens, now out in the air.
So, go ahead. Unless you’re getting fancy, you can try this right now without even a strip of gaffer tape (although that would work, too). the picture at the top of the post was taken with a Nikon D700 with a 50mm, ƒ1.8 lens held in front. The slightly blurred picture below is of a bowl of seeds in the kitchen.

You can easily see the shallow depth of field here. In fact, I made this even worse by actually tilting the lens in front of the camera. It’s hit or miss, but you can get passable tilt-shift effects when you’re lucky.
And one further tip — set the camera to show the images on the LCD screen immediately and automatically. I didn’t and I had to keep hitting the button with the tip of my nose.
Post the results to the Gadget Lab Flickr group
See Also:


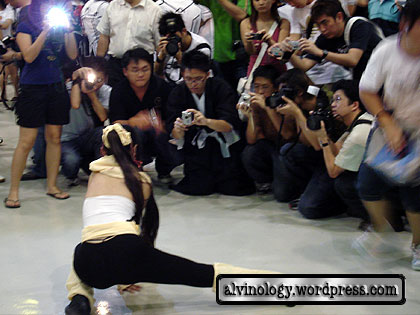
 Today we celebrate the unsung hero of the trade show, the creepy guy who stops at nothing to acquire the perfect shot of a girl who probably hates him.


