
Canon 5D Mark II vs. Nikon D700 Review Shoot-Out
Posted in: feature, review, Reviews, Today's Chili, top For the last few months, we’ve been shooting with the two hottest cameras on the market. Lucky us. If you’ve been eyeing either one of these for purchase, here’s everything you need to know.
Camera makers love to invent new categories. And while that can often lead to endless bloat, the Canon 5D Mark II and the Nikon D700 represent a sweet spot that had never been hit before—the semi-pro body with a full-frame sensor. And it’s the category with the most bang for buck we’ve seen to date.
Yes, let’s just get this out of the way: Both the D700 and the 5D Mark II give you more for your dollar in terms of features, image quality and overall excellence than anything else we’ve used. Period. We know not everyone is prepared to drop $2,000 to $3,000 on a camera body these days, but if you’re thinking of investing for the long haul and, more importantly, have a good collection of either Nikon or Canon lenses, these are the two cameras you want to look at.
Why? Because they give you almost everything from Nikon and Canon’s uber-pro top end for a whole lot less, most importantly the full-frame sensor (FX in Nikon parlance). With a sensor the same size as a piece of 35mm film, your old Nikon or Canon glass will produce beautiful results on these new bodies (assuming they’re new enough to autofocus and couple to the cameras’ meters). And if you don’t have a collection built up already, your choices for new lenses will be significantly more exciting without the APS-C (DX, again, in Nikon’s world) sensor’s 1.6x crop factor changing their effective focal lengths.
The sensors in these two cameras are also responsible for their absolutely stunning high-ISO sensitivity performance—if you would have told me a few years ago that I could get 100 percent usable and almost noise-free shots in the dark at ISO 4000 with hand-holdable shutter speeds, I would have laughed in your Nostradamus-looking face. But that’s the reality here, and it’s awesome.
But of the two, which to choose? Now that’s the question, isn’t it. Here we’ll share what we’ve learned from shooting with the 5D Mark II and D700, for work and for play, and hopefully you’ll be able to make your own call.
Image Quality/Sensor Sensitivity
Again, both of these cameras will blow your mind with their high-ISO performance. Both go up to a ridiculous 25,600 ISO rating. The magic does not lie in their gaudy top-range though, which as you can see in our galleries below is still prit-tay, prit-tay noisy. No, the crazy thing here is that with both of these DSLRs, you can shoot at 3200, 4000, even 6400 in the right light and still have photos that look practically noise-free on screen. That’s just crazy, and you can’t accurately describe what this means to you as a photographer until you’ve shot your friends—handheld at quick enough shutter speeds—around a candle-lit table, and gotten photos that look absolutely gorgeous. Before, it took a crazy expensive lens to even come close to this, and even then, sensors (or even high-ISO film) couldn’t keep up.
With the 5D Mark II and the D700, you’re basically shooting with night vision. Like I was doing here at Snowscrapers a few weeks back. As you can see, there are floodlights, but it’s dark. These guys are moving fast. But I can crank up the ISO high enough to pan with them without blurring them out, and grab stuff like this, without the sky turning into a snowstorm of noise.

Let’s compare the high-ISO range of both cameras head-to-head, shall we:
As you can see from these unprocessed (save for JPEG conversion and re-sizing with Aperture) RAW shots files from each camera with high-ISO noise reduction at its highest setting on both, the D700 has a slight edge. The 5D Mark II’s higher resolution leaves lots of room for chroma noise, the bursts of mostly red and green you see in the full crops.

But still, unless you look at them at full-res, both cameras produced almost noiseless images up to ISO 3200. I exposed each shot at f/5.6 so the shutter speeds for the ISO 1600 and 3200 shots were upwards of a few seconds each, which makes the fact that they’re almost noise-free at any decent print or display size a phenomenal sign of both cameras’ noise-busting powers.
One big difference head to head in the imaging department is resolution. At 21 megapixels, the 5D Mark II has almost double the pixels of the 12.1 megapixel D700. As you well know by now, megapixels are not as important as sensor size/quality, but here, we’re dealing with two evenly matched, high-performance sensors, both of them full-frame. So in this case, an extra 9 million pixels does give you something: The added ability to heavily crop down shots without losing detail, like I did here with Mr. Shaun White.
Folks shooting in RAW will also notice the extra resolution with added RAW headroom (meaning, more detail can be salvaged in post-processing from highlights that would be blown out to flat white in a JPG). But on the other hand, a 21-megapixel RAW file from the 5D Mark II weighs in at around 30MB give or take, so unless you’re ready to buy a huge RAID drive to go along with it, the higher resolution may not be your choice in most situations. In all honesty, for 800-pixel-wide shots intended for Gizmodo pages, I never shot above the smallest JPG size, which is still a massive 2784×1856.
Advantage: Draw The D700 does slightly better at high ISO, but the 5D Mark II has a significant upper hand in resolution.
Shooting Features
Here’s one area where there is a definitive leader, and it’s the D700. Its Multi-Cam 3500 auto-focus processor has 51 AF points, compared the the 5D Mark II’s nine (it inherited the same autofocus system from the original 5D, which was itself a bit outdated). It is decidedly better at tracking moving objects with all of these focus points, and also tends to lock in to the correct focus considerably faster.
Even without shooting, it’s easy enough to spot the difference by looking through the viewfinders. The 5D Mark II’s focus points are concentrated mostly in the center of the frame in a diamond shape, whereas the D700’s central points cover far more ground, and zone points cover the outer areas of the frame. So with autofocus, this is cut and dry: Although the 5D Mark II’s AF is quite competent, the D700 wins if you frequently shoot fast-moving kids, animals (same thing?) or sports. The D700 does have a focus-assist lamp (the 5D Mark II doesn’t) to help get this level of detail in low-light, but you can shut it off.
As far as metering and image processing goes, I also lean toward the D700. As most Nikons do, the D700 tends to saturate colors more in its default settings (which of course can be changed). I’m a fan of this look, but that’s all about settings, which should most likely be done on the computer. So a toss-up there, for the most part.
More important is my completely unscientific but still notable feeling that the D700 tends to meter scenes with more skill than the 5D. Here the difference is subtle, but I feel like I had to hit the exposure compensation knob a bit more frequently on the Canon to keep it from blowing out highlights, where the D700 would expose the frame more naturally.
Here are some D700 shots that Matt and I took:
Advantage: D700
Interface/Handfeel/Menus
Here’s where the Nikon vs. Canon flames start to get intense—both cameras take a decidedly different approach to menus and basic shooting controls. For me, I like a dedicated button wherever possible, even if this means the body is littered with switches and knobs of all sorts. This is the Nikon approach, more or less; ISO, file size, white balance, autofocus point selection, metering mode and even mirror lock-up get their own dedicated switches on the D700, which makes switching all of these things easier. On the 5D Mark II, all of these major settings share a button—press it, then rotate the thumb wheel to change one setting, and the index-finger wheel on the front for the other. I almost never remember which dial changes which setting, so that can be annoying.

On the other hand, I am a huge fan of Canon’s jumbo thumb wheel in general—something no Nikon has. Being able to always change EV with the thumbwheel is huge, and in manual mode, you can’t beat having that big knob down there. It’s also great for quickly scrolling through your images. I also much prefer the traditional Canon shooting-mode selector wheel; on the Nikon, you have to press down a button and turn a wheel at the same time. But these all come down mostly to personal preference. And in the on-screen menus, again, preference: Canon tends to split their menus out into multiple screens with every option on the screen at once without scrolling, where Nikon gives you long scrolling lists. Canon did provide a nice quick-access menu to most major settings via the LCD, which is an improvement for them.
And even though the D700 is a good 300 grams heavier than the 5D Mark II with lens, it feels a bit more balanced (almost gyroscopic) in your hand, so that’s good, if you don’t mind the extra weight.
Advantage: D700 Another tough call, but I’m giving it to D700 by a nose for all the dedicated switches, even though I like several of Canon’s choices better.
Extras
Let’s not ignore the elephant in the room: The 5D Mark II is the first DSLR in the world to shoot 1080p (30fps) HD video through its live view mode (see here for more on how this works). By now you’ve thoroughly ogled Vincent La Foret’s amazing demo film—let me tell you, nothing I shot can come close to that. But what even the least video-inclined person will find is that videos look absolutely incredible shot with the limited depth of field of an SLR lens feeding a big full-frame sensor.
There are some drawbacks though, which will ensure your HD camcorder still has some time left: Autofocus is non-existent. When you press the autofocus button during video capture—and that’s the only way to activate it—you’ll need to be prepared to edit out the part in your video where either the mirror slaps up to expose the AF sensor or the contrast detection system cranks the exposure way up (accompanied by the sound of your lens squeaking into position after a good 4 to 5 seconds of hunting). If you’re cool with that, then you’ll be OK, because the autofocus does work, after mangling your videos for a few seconds. Thankfully, manual focus works just fine. You can zoom in with the LCD to make sure you’ve nailed the focus, although this can be kind of tricky to juggle while twisting the focus ring and trying to keep the shot framed at the same time.
Another drawback is that, aside from shifting the EV exposure compensation, you can’t change exposure or ISO settings while you’re filming.
But for grabbing quick 90 to 120 second clips of relatively stationary subjects, or things far enough away to be covered by your infinity focus (like the snowboarders here), then you’re absolutely golden. Your clips, with their popped colors, low-light sensitivity and limited depth of field will be far more beautiful than anything spit out by a Flip video cam or, in some cases, your dedicated camcorder.
Here’s a quick montage of some stuff I shot around town:

On top of the video shooting, the 5D Mark II also comes with a better kit lens than the D700, a 24-105mm L-series that’s f/4 throughout the range. I would normally feel the constraints of f/4 pretty hard and long for my f/1.4 50mm, but with the 5D Mark II you almost don’t notice, when you factor in VR and the crazy-bananas low-light sensitivity. The D700 comes with a capable but not nearly as performance-centric 24-120 f/3.5-f/5.6 zoom.
Oh, and I almost forgot: The D700 has a built-in flash, and the 5D Mark II does not. Which is something I would only ever think of using as a fill in the day time. So that’s not that big of a deal for me, but it might be for you. Update: As many of you guys have pointed out, the D700 on-board flash can also be used to wirelessly trigger Nikon’s CLS compatible strobes. Cool feature.
Advantage: 5D Mark II Easy call there.
Conclusion
Today in the DSLR world, wedged somewhere in the middle of entry-level APS-C, semi-pro APS-C, pro APS-C and pro full-frame, we now have a nice semi-pro full-frame option to consider. The categories may be piling up, but we are so happy this new one came along. Now that getting a full-frame sensor doesn’t require going into hock to get the same body that photojournalists are taking to Iraq, we serious-but-still-recreational shooters can use these full-framers to get great shots at ISO settings so high it’s ridiculous to think about. And on the 5D Mark II, we can film 1080p video. Holy crap.
In the end, for me, I give the trophy to the 5D Mark II for the 1080p video. It’s got its drawbacks, sure, but being able to switch seamlessly from stills to beautiful movies with my awesome 35mm DSLR lens is just too good to be true. The D700 has an edge, albeit a slight one, in some categories like high ISO, but in the new world order, 1080p video from your DSLR is an ace that can’t be beat.
Things are even more clear cut when both cameras were selling for MSRP: Adding insult to injury after nearly matching Nikon in ISO sensitivity and adding 1080p video and almost double the resolution, Canon priced the 5D $300 lower than the D700 ($2700 vs $3000 for body-only). The D700’s been on the market a few months longer, though, and the prices are starting to come down—you can get the body for $2450 at B&H right now. With the 5D Mark II still backordered just about everywhere, this disparity will probably last for a while.
So for you it may be an interesting decision. The option to save a few hundred bucks and get a smidge less noise at high ISO is surely attractive. Either way, you’ve got an absolutely amazing camera. I would imagine most people considering a $2,000 to $3,000 body already have a lens or two of one of these two systems—so in the end, you may go with the one you already have glass for. If you’re a Nikon person, this may mean holding off on the D700 and waiting a while for 1080p.
We based this review on real-world experience, and we didn’t spend any time in a lab for testing. Consider supplementing our impressions here with the good work done by our friends at digitalcamerainfo,com (read their 5D Mark II review and their D700 review), as well as teh labcoated folks over at DPReview’s takes: here is their D700 review and their 5D Mark II review. And, while we focused here on Canon and Nikon, the Sony Alpha 900 is also a contender in this price range for a full-frame shooter, though in our experience, it doesn’t touch either of these two, especially in high-ISO performance.
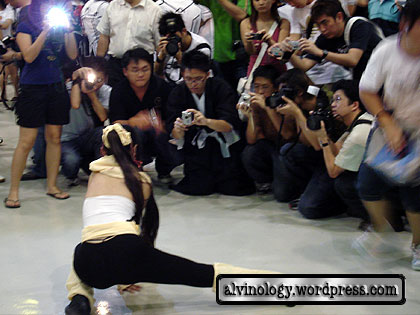
 Between all the new
  Today we celebrate the unsung hero of the trade show, the creepy guy who stops at nothing to acquire the perfect shot of a girl who probably hates him.
 When we recently posted a
  I took my Bushhawk stock along for the ride out to Kajaki. The stock is of limited use as in remote regions such as this, the local population has never seen a DSLR so they limited trust when you’re pointing a long lens at them. In operations where we were going patrols or at night with night vision I’d use it a lot. However, when going where the bad guys are, there is little worry as I was with some of the best Soldiers in the world.
 Okay, so why risk losing your life. Good question. Lemme see if I can figure it out.
 I have to say that there is something inherently fun about shooting a camera like a rifle. It is really more fun than I should admit. I found myself grinning every time I used the darn thing.
 Whoa, what camera is that?
 Whether your camera is brand new or an aging holdover, you want to accessorize it, but you don’t want to pay. By now, you know the Dealzmodo Hack drill: Paying is for suckers.
 Build your own stabilizer out of string
 Build your own L-bracket, for serious stability, vertical mounting
 The “David Pogue Special”: Use a lamp as a tripod
 Scrounge up household flash diffusers
 Calibrate color temperature with free flooring samples
 Make flash deflection umbrellas from actual umbrellas
 Build still-life photography studio for free(ish)
 Snap magazine-style portraits, beautiful macros with a homemade ringlight
 Foam-fit an old bag to hold your gear